Evacuation Sign Viewer
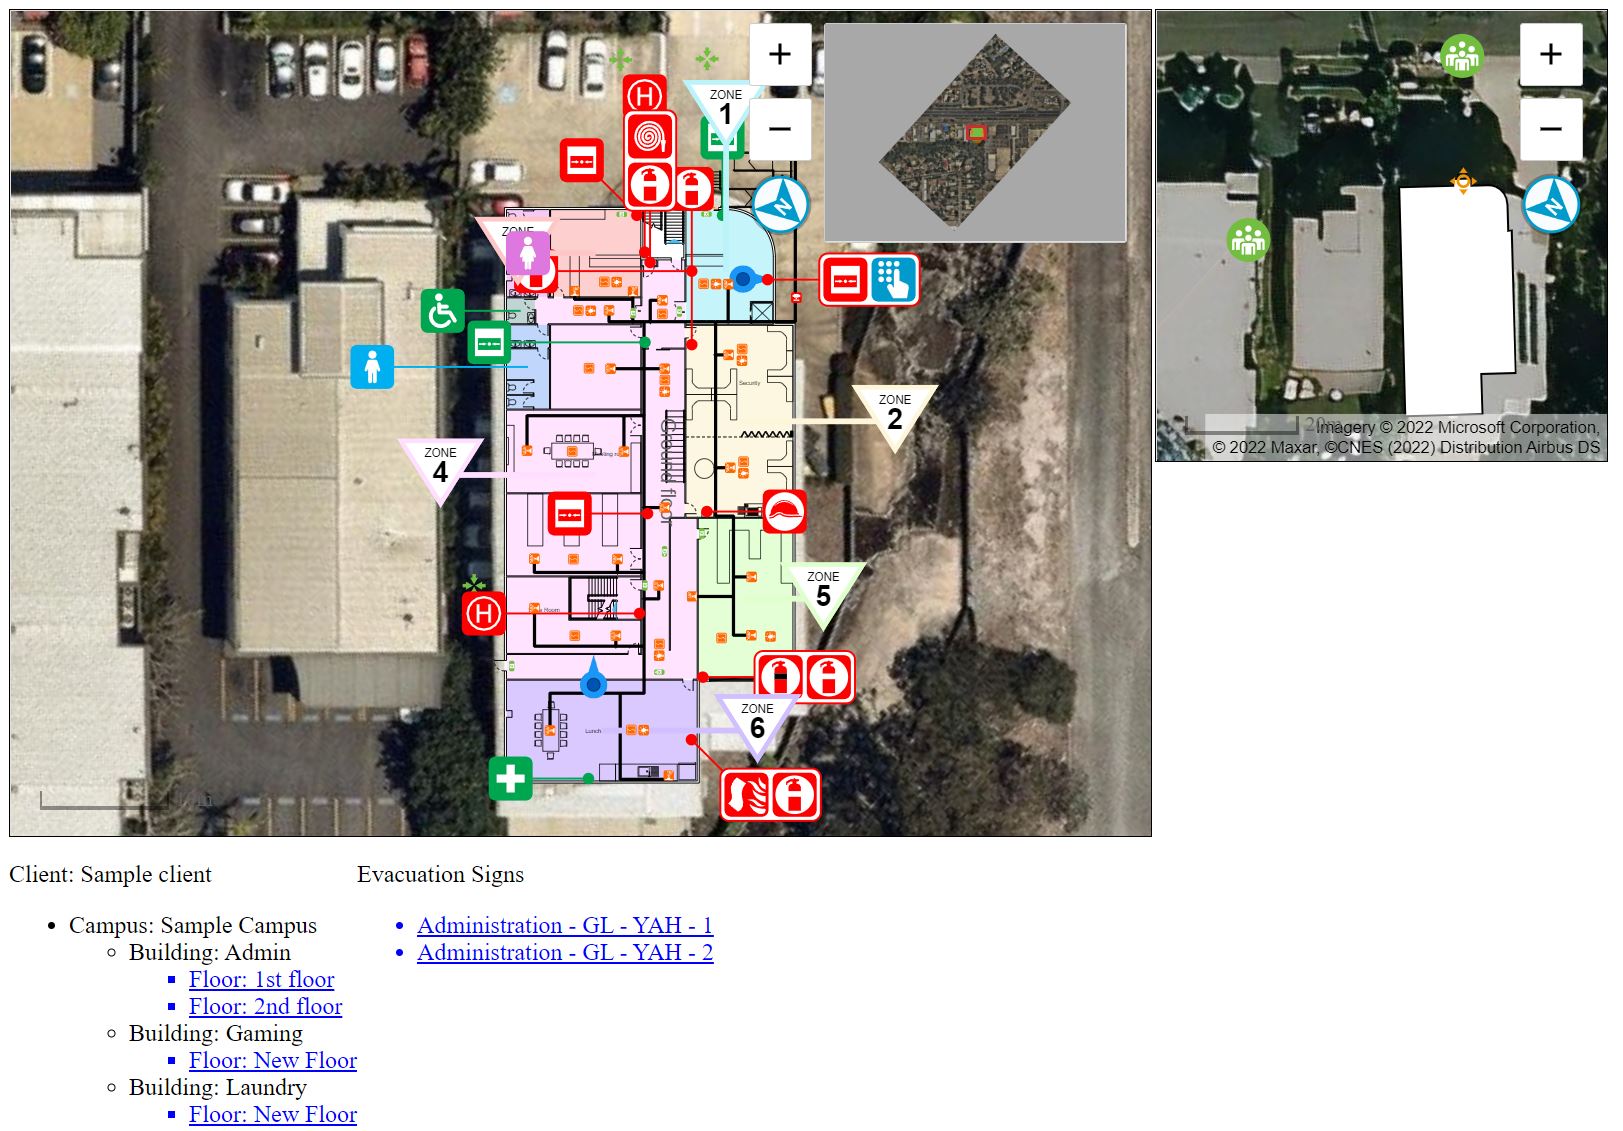
The evacuation sign shows the floor plan and provides necessary information in case of emergency. The sign must face the same direction as the viewer.
After adding a new evacuation sign on the plan and providing the diagram details for how the sign looks in PlanStudio, you must lock the frame to fix the view position.
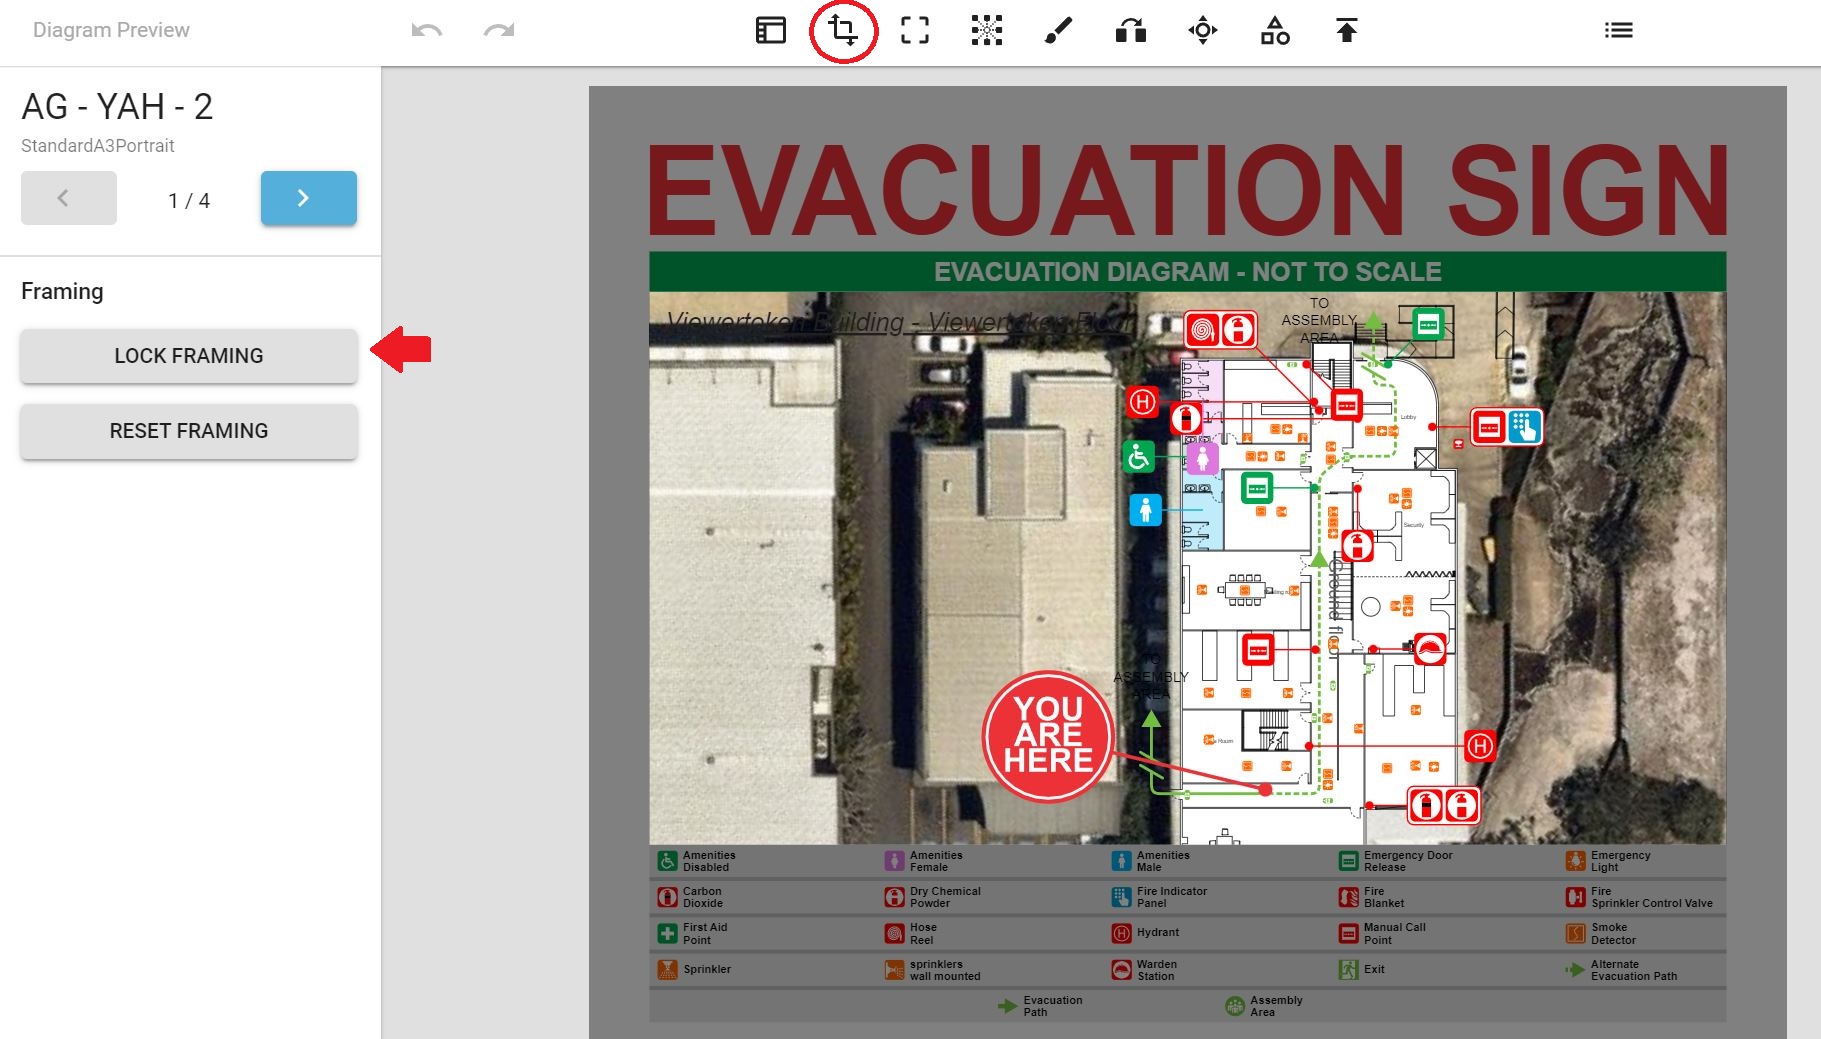
In this section, we will list the hierarchy and evacuation signs on each floor which will allow users to switch between floor plans or even across the building easily. Then, given an evacuation sign, we will display the associated floor plan and align its rotation and framing with the evacuation sign.
- Listing Site Hierarchy
- Listing Evacuation Signs
- Viewing Evacuation Signs
- Evacuation Route
- Full Example Code
Listing Site Hierarchy
In most cases, you won’t know the plan code by heart or you might want to work on multiple plans. Displaying the site structure with selectable floor plans would be useful for this. Simply use locatrix.plans.loadHierarchy to construct the site information. Something like the following:
  ...
  <div id="siteInformation" style="float: left;"></div>
  <script>
    function loadSiteInformation () {
      locatrix.plans.loadHierarchy(VIEWER_TOKEN).then(function (hierarchy) {
        let hasPlan = false
        let siteInformationDiv = document.querySelector('#siteInformation')

        for (const client of hierarchy.clients) {
          let clientTag = document.createElement('p')
          clientTag.innerHTML = `Client: ${client.name}`
          siteInformationDiv.appendChild(clientTag)
          let campusUl = document.createElement('ul')
          for (const campus of client.campuses) {
            let campusLi = document.createElement('li')
            campusLi.innerHTML = `Campus: ${campus.name}`
            let buildingUl = document.createElement('ul')

            for (const building of campus.buildings) {
              let buildingLi = document.createElement('li')
              buildingLi.innerHTML = `Building: ${building.name}`
              let floorUl = document.createElement('ul')

              for (const floor of building.floors) {
                let floorLi = document.createElement('li')
                floorLi.innerHTML = `Floor: ${floor.name}`
                if (floor.planCode != null) {
                  hasPlan = true
                }
                floorUl.appendChild(floorLi)
              }
              buildingLi.appendChild(floorUl)
              buildingUl.appendChild(buildingLi)
            }
            campusLi.appendChild(buildingUl)
            campusUl.appendChild(campusLi)
          }
          siteInformationDiv.appendChild(campusUl)
        }

        if (!hasPlan) {
          throw new Error('Viewer token missing floor plan')
        }
      }).catch(function (error) {
        console.log(error.message)
      })
    }
    loadSiteInformation()
  </script>
Listing Evacuation Signs
If we want to access a plan’s contents, we have to first load it. The standalone locatrix.plans.loadPlan function allows you to load the plan data without the use of a Viewer. Adding onclick to each floor <li> element from the previous step, then calling loadPlan when a floor is clicked, we can cycle through the evacuation signs on this floor and list them on the page.
  ...
  <div id="siteInformation" style="float: left;"></div>
  <div id="evacSignList" style="float: left;"></div>

  <script>
    function loadEvacSignList(floorPlanCode, sitePlanCode) {
      locatrix.plans.loadPlan(VIEWER_TOKEN, { planCode: floorPlanCode }).then(function (plan) {
        const evacSignFeatures = plan.getFeatures().filter(f => f.getType() === 'evacSign')

        let evacSignListDiv = document.querySelector('#evacSignList')
          evacSignListDiv.innerHTML = '<p>Evacuation Signs</p>'
          let ulTag = document.createElement('ul')
          for (const evacSignFeature of evacSignFeatures) {
            let liTag = document.createElement('li')
            liTag.innerHTML = evacSignFeature.getSignRef()
            ulTag.appendChild(liTag)
          }
          evacSignListDiv.appendChild(ulTag)
      })
    }

    function loadSiteInformation () {
      ...
      if (floor.planCode != null) {
        floorLi.style.cssText = 'cursor: pointer; color: blue; text-decoration: underline;'
        floorLi.onclick = function () {
          loadEvacSignList(floor.planCode, campus.planCode)
        }
        hasPlan = true
      }
      ...
    }
    ...
  </script>
Viewing Evacuation Signs
Once you have the list of evacuation signs, you can add onclick to <li> elements to load the floor plan and site plan viewers.
  liTag.innerHTML = evacSignFeature.getSignRef()
  liTag.style.cssText = 'cursor: pointer; color: blue; text-decoration: underline;'
  liTag.onclick = function () {
    onEvacSignSelect(floorPlanCode, sitePlanCode, evacSignFeature)
  }
  ulTag.appendChild(liTag)
Next, use viewer.setFraming to match the floor plan fram with the frame of the selected evacuation sign. If the evacuation sign frame has not been locked in PlanStudio, you must ensure to set the rotation so at least the evacuation sign is facing the correct direction.
In cases where you are working with multiple Viewers, the ViewerObserver can be useful to simplify event handling. It notifies us when all observed Viewers have finished loading. In this case, you can set the framing on both views when any of the views has been loaded rather than handle load events for the floor plan view and site plan view separately.
...
<div style="width: 760px; position: relative; display: inline-block;">
  <div id="viewer" style="width: 100%; height: 550px; border: 1px solid black;"></div>
  <div id="siteInformation" style="float: left;"></div>
  <div id="evacSignList" style="float: left;"></div>
</div>
<div id="siteviewer" style="width: 300px; height: 300px; display: inline-block; border: 1px solid black; vertical-align: top;"></div>

<script>
  let selectedEvacSignFeature = null
  let selectedFloorPlanCode = null
  let selectedSitePlanCode = null

  function setFraming() {
    const framing = selectedEvacSignFeature.getFraming()
    let signRotation = null

    if (framing == null) {
      // evac sign's frame did not lock
      signRotation = selectedEvacSignFeature.getRotation()
      viewer.setRotation(signRotation)
    } else {
      signRotation = framing.rotation
      viewer.setFraming(framing)
    }

    if (selectedSitePlanCode !== null) {
      siteviewer.setRotation(signRotation)
    }
  }

  function onEvacSignSelect (floorPlanCode, sitePlanCode, evacSignFeature) {
    selectedEvacSignFeature = evacSignFeature

    if (selectedFloorPlanCode == null || selectedFloorPlanCode !== floorPlanCode) {
      selectedFloorPlanCode = floorPlanCode
      selectedSitePlanCode = sitePlanCode
      viewer.loadPlan(VIEWER_TOKEN, { planCode: floorPlanCode, enableAllIcons: true, useNaturalRotation: true, stabilizeIconsWhilePanning: false, enableWorldPaths: true })
      siteviewer.loadPlan(VIEWER_TOKEN, { planCode: sitePlanCode })
    } else {
      setFraming()
    }
  }

  function loadEvacSignList(floorPlanCode, sitePlanCode) {
    ...
  }

  function loadSiteInformation () {
    ...
  }

  const VIEWER_TOKEN = ''
  var viewer = new locatrix.plans.Viewer(document.querySelector('#viewer'))
  var siteviewer = new locatrix.plans.Viewer(document.querySelector('#siteviewer'))
  siteviewer.widgets.minimap.setEnabled(false)

  var viewerObserver = new locatrix.plans.ViewerObserver([viewer, siteviewer])

  viewerObserver.on('load', function (e) {
    setFraming()
  })
  loadSiteInformation()
</script>
Changing Focal Point and Zoom
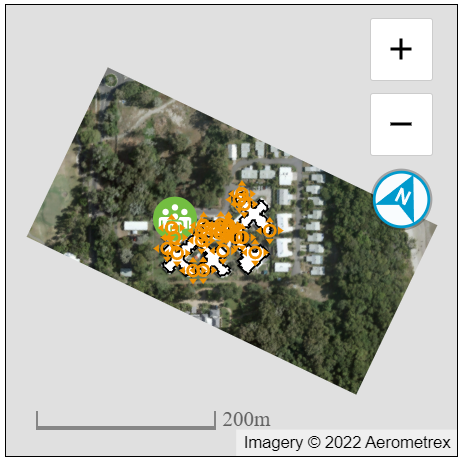
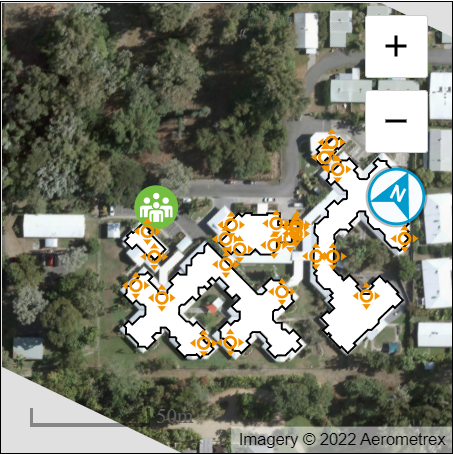
By default, the site plan viewer will show the entire site plan, which might not be useful in a small viewer area. You can change the focal point and zoom to focus on the selected floor plan by using plan.getFocalPointAndZoomToFill.
  function setFraming() {
    ...

    if (selectedSitePlanCode !== null) {
      siteviewer.setRotation(signRotation)

      const focalPointAndZoom = siteviewer.getLoadedPlan().getFocalPointAndZoomToFill(signRotation, siteviewer.getViewerWidth(), siteviewer.getViewerHeight(), selectedFloorPlanCode)
      siteviewer.setZoom(focalPointAndZoom.zoom)
      siteviewer.setFocalPoint(focalPointAndZoom.focalPoint)
    }
  }
Before
After
Evacuation Route
An evacuation route is a way to get out of a building if there is an emergency. People might also refer to it as an escape route.
At any point on a floor plan you can get all posible evacuation paths from plan.getEvacPathsFromPoint. Then using viewer.setEnabledEvacPaths for the paths to be displayed. This will map out a primary evacuation route and alternate routes in case your intended route is blocked.
...
<button id="evacRoute" onclick="showEvacPaths()">Evacuation Route</button>

<script>
  ...
  function showEvacPaths() {
    showEvacPaths(selectedEvacSignFeature.getPoint())
  }

  function showEvacPaths(point) {
    const floorPlan = viewer.getLoadedPlan()
    const floorEvacPaths = floorPlan.getEvacPathsFromPoint(point)
    viewer.setEnabledEvacPaths(floorEvacPaths)
  }

  viewer.on('click', function (e) {
    showEvacPaths(e.point)
  })
  ...
</script>
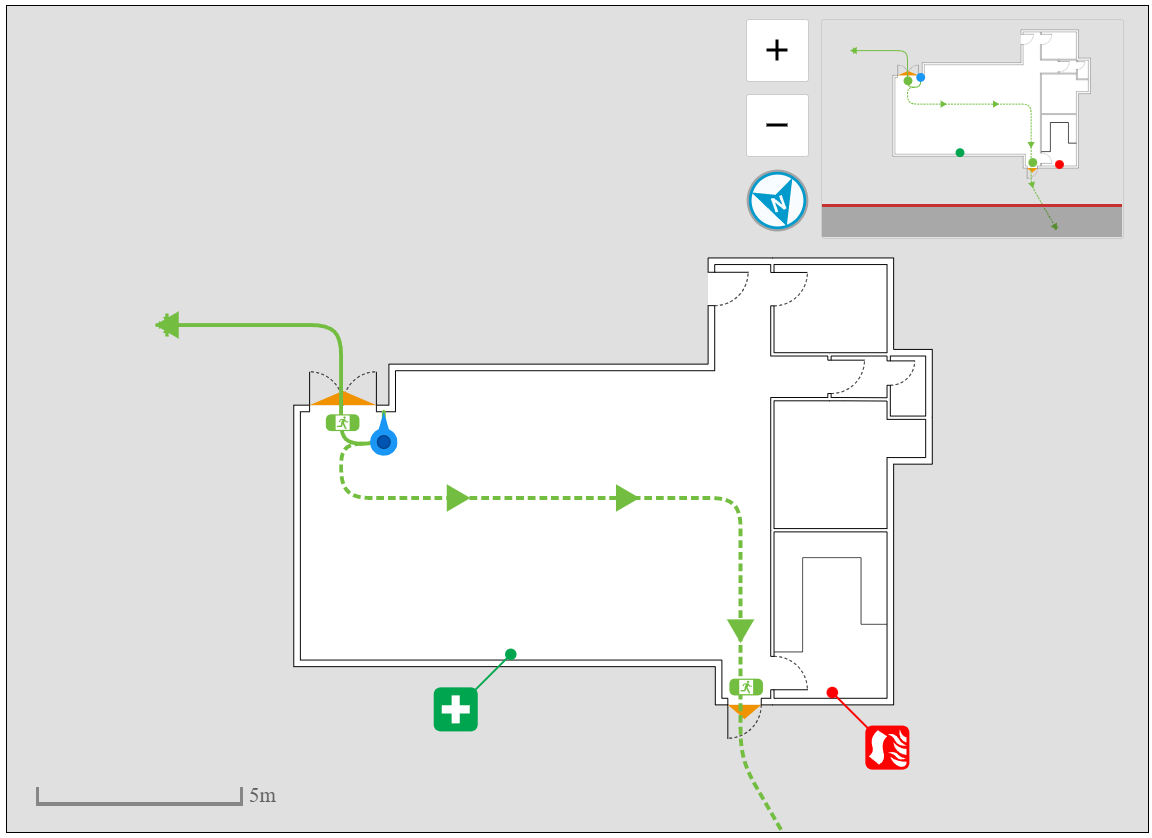
Once out of the building, evacuation paths leading to the designated assembly point can be found on a site plan from plan.getEvacPathsFromFloorPlan using the previous floor plan and its evacuation paths.
When calling getEvacPathsFromFloorPlan with the floor plan evac paths, the SDK uses the evacuation configuration of the evac sign closest to the point that was used to generate the floor plan evac paths.
If the evac paths of the site plan do not match with the floor plan paths, please check the current Final Exits setting in PlanStudio.
  function showEvacPaths(point) {
    ...
    const sitePlan = siteviewer.getLoadedPlan()
    const siteEvacPaths = sitePlan.getEvacPathsFromFloorPlan(floorPlan, floorEvacPaths)
    siteviewer.setEnabledEvacPaths(siteEvacPaths)
    siteviewer.setHighlightedPlanFootprints([ floorPlan.getPlanCode() ])
  }
Full Example Code
Here is the completed example for you to play around with. The current SDK script points to the live environment with a sample viewer token.