Interacting with the Viewer
In PlanStudio, you can add a custom data field to a specific feature which helps you to describe each individual item. For example, you can add a new field to record when a photo has been taken, what model of security camera, or an asset ID.
In this section, we will use the SDK to interactively retrieve data values attached to Features and then display them in the Viewer.
Using Data Fields and Features
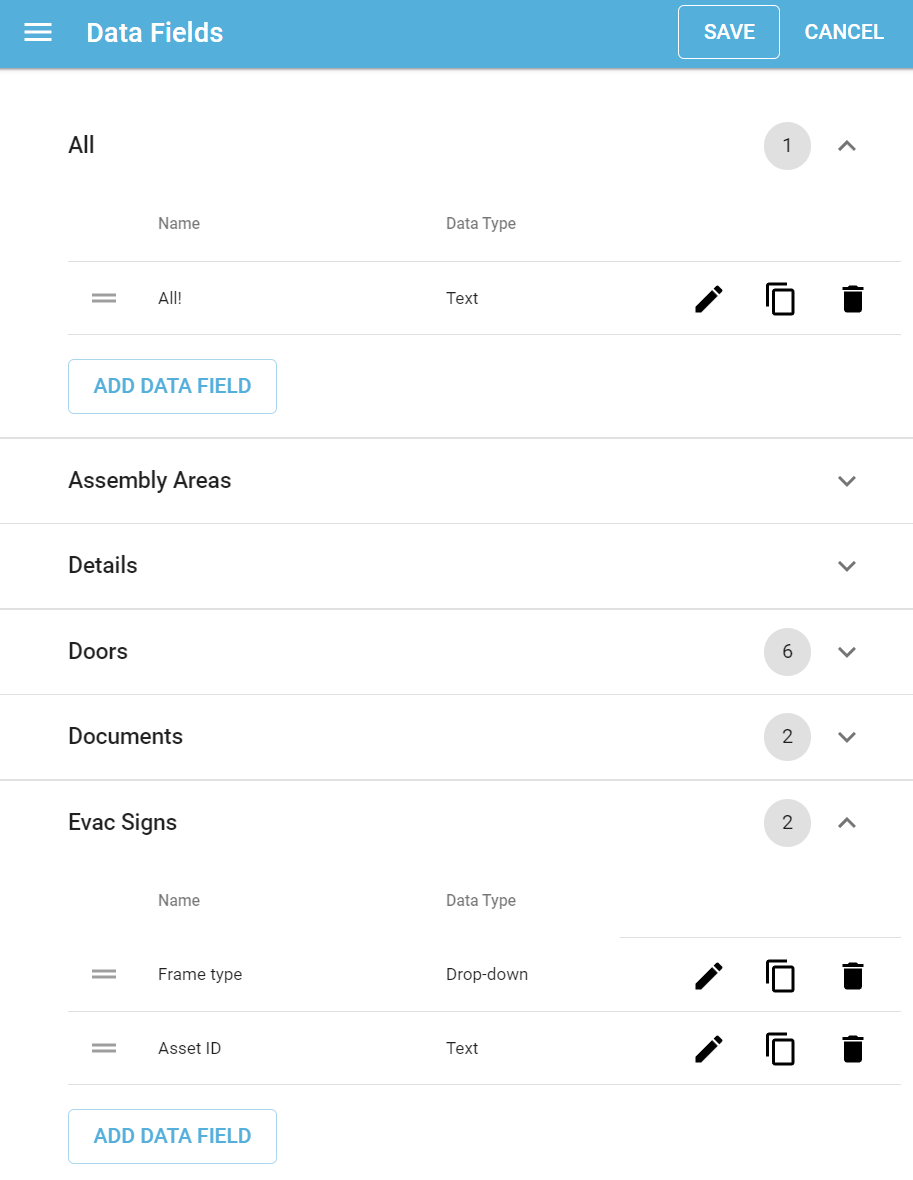
A data field describes custom data that is attached to features. You can add and modify data fields in PlanStudio administration tools.

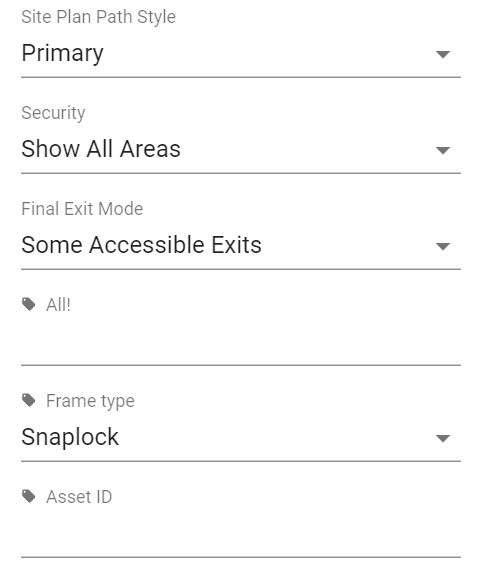
Once a custom data field has been added, it will be visible in the inspector when selecting an item of eligible type. The data value can be modified within the inspector.

In the SDK, you can retrieve information on data fields once a plan has successfully loaded.
<script>
  ...
  viewer.on('load', function (e) {
    const dataFields = viewer.getLoadedDataFields()
    console.log(dataFields)
  })
  viewer.loadPlan(VIEWER_TOKEN, { planCode: 'pln_xxx001' })
</script>
Querying Data Fields
Once the plan is loaded, you can find your custom data field by feature type. A list of feature types can be found in Features.
In the above screenshots, one custom field was added which applied to all Features, and two custom fields which applied directly to evacSign Features. When dataFields.getFieldsForFeatureType is called for the evacSign type, all three fields will be returned. You can then do additional filtering, such as finding a data field with a particular name.
For Feature types fixedIcon, leaderlineIcon, or zonedIcon, the optional parameter subType must be set to an iconType in dataFields.getFieldsForFeatureType(featureType, subType).
  const dataFields = viewer.getLoadedDataFields()
  const fields = dataFields.getFieldsForFeatureType('evacSign')
  console.log(fields.find(f => f.displayName === 'Asset ID'))
Expected result:
  {
    "key": "dfld_xxx03",
    "displayName": "Asset ID"
  }
Get Data from Features
You can also find a specific data field from a Feature object by searching for a name or key obtained from the previous step. The returned object will include the data field’s value.
  const features = viewer.getLoadedPlan().getFeatures()
  const evacSignFeatures = features.filter(f => f.getType() === 'evacSign')
  for (const evacSignFeature of evacSignFeatures) {
    const fields = evacSignFeature.getData()
    console.log(fields.find(f => f.displayName === 'Asset ID'))
  }
Expected result:
  {
    "key": "dfld_xxx03",
    "displayName": "Asset ID",
    "value": ""
  }
Adding Interactivity
To make the display area interactive, you can allow users to select an item and see its data field values. You can achieve this by listening to the Viewer’s click event. When fired, the Viewer will provide us with an event object containing a list of Features at the clicked position, ordered by layer.
Popups
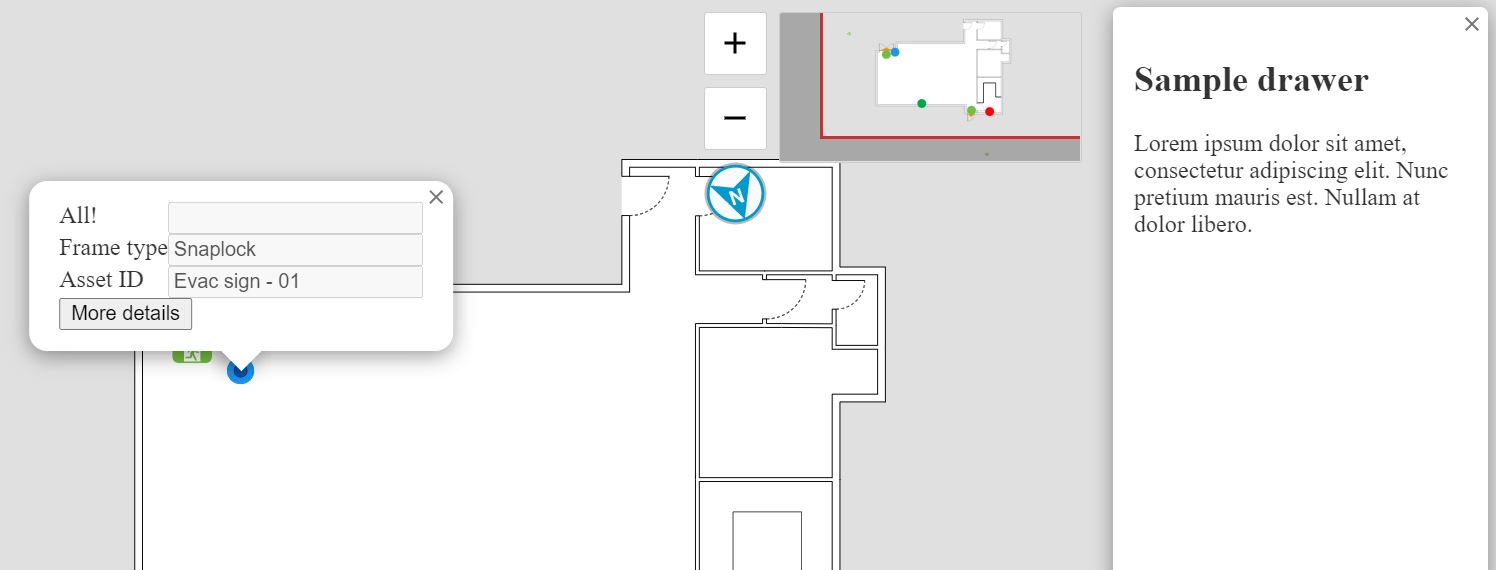
The Viewer exposes several ways to add custom content. Popups can be used to present positioned information in a popup style, exposed via the viewer.addPopup API.
You can pass HTML content and specify the location at which to display a popup using the click location as in the example below or using a feature’s location feature.getPoint().
<script>
  ...
  function showDataFieldPopup (feature, point) {
    const dataFields = feature.getData()
    let content = ''
    for (const dataField of dataFields) {
      content += `<label for="${dataField.key}" >${dataField.displayName}</label>
                  <input type="text" id="${dataField.key}"" value="${dataField.value}" style="float: right;" disabled >
                  <br style="clear: both;">`
    }
    viewer.addPopup({ anchor: { latitude: point.latitude, longitude: point.longitude }, content })
  }

  viewer.on('click', function (e) {
    for (const feature of e.features) {
      if (['evacSign', 'exitSign', 'fixedIcon', 'leaderLineIcon', 'zonedIcon'].includes(feature.getType())) {
        showDataFieldPopup(feature, e.point)
      } else {
        console.log(feature.getData())
      }
    }
  })
</script>
Using Drawers
viewer.addDrawer allows you to create a drawer by providing a display direction and HTML content. viewer.addDrawer also returns a drawer instance which allows you to update the display. Please check Drawer for more information.
For this example, we simply add a button within the popup to call viewer.addDrawer.

<script>
  ...
  function showSampleDrawer() {
    const content = `<h2>Sample drawer</h2>
                    <p>Lorem ipsum dolor sit amet, consectetur adipiscing elit. Nunc pretium mauris est. Nullam at dolor libero.</p>`
    viewer.addDrawer({ side: 'right', content, open: true })
  }

  function showDataFieldPopup (feature, point) {
    const dataFields = feature.getData()
    let content = ''
    for (const dataField of dataFields) {
      content += `<label for="${dataField.key}" >${dataField.displayName}</label>
                  <input type="text" id="${dataField.key}"" value="${dataField.value}" style="float: right;" disabled >
                  <br style="clear: both;">`
    }
    content += '<button onclick="showSampleDrawer()">More details</button>'
    viewer.addPopup({ anchor: { latitude: point.latitude, longitude: point.longitude }, content })
  }
  ...
</script>
Full Example Code
Here is the completed example for you to play around with. The current SDK script points to the live environment with a sample viewer token.